Tomb Raider III Swimming Pool - Remodelled
First came Swimming Pool v1 - the classic glass ceilinged room in TR1, 2 and 3. Then v2, Crystal Dynamics' totally redesigned version from Legend and AE. Now here's v3; the original design, remade in breathtaking* 3D...
- Final Renders
- Video/360° View
- Development Pics
- Source Code
- FAQ
- Reuse and Distrubution
- Acknowledgements
So one day I was bored. I'd played around with POV-Ray (a "ray tracing" program that lets you build photorealistic images with the computer). Since Eidos did a Tomb Raider remake in the form of Anniversary Edition, I thought I'd have a go at remodelling one of the rooms myself. How hard can it be...?
What better place to start than Lara's house, which changed quite dramatically in recent versions of Tomb Raider. After all, maybe some fans might like to see what the original house looks like with modern* graphics. And what better room to rebuild than the swimming pool where you get the graphical fun of water, fire, plants, and sunlight through a glass ceiling all in one place?
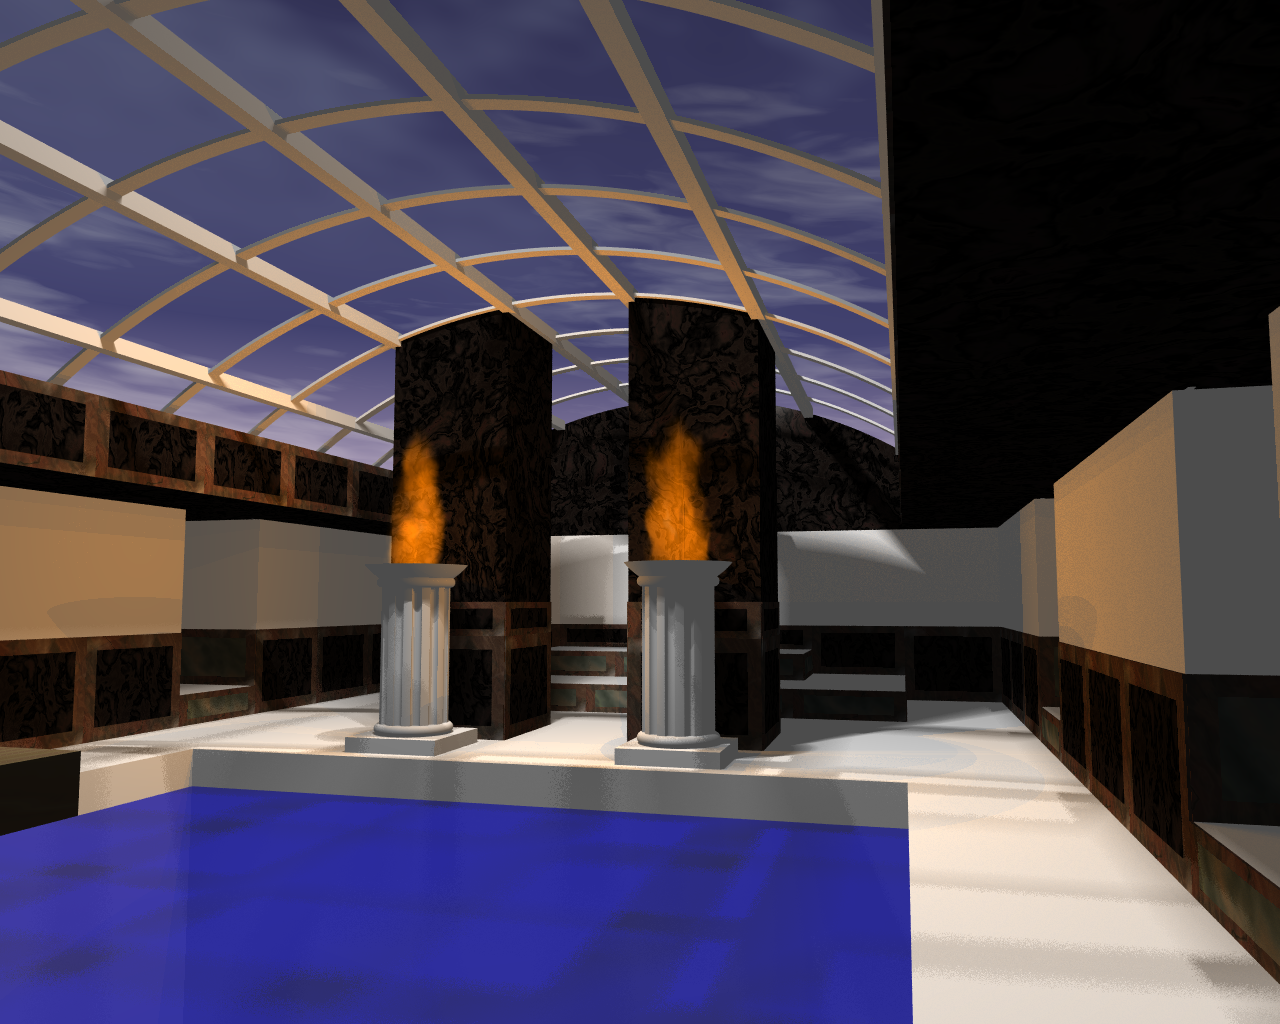
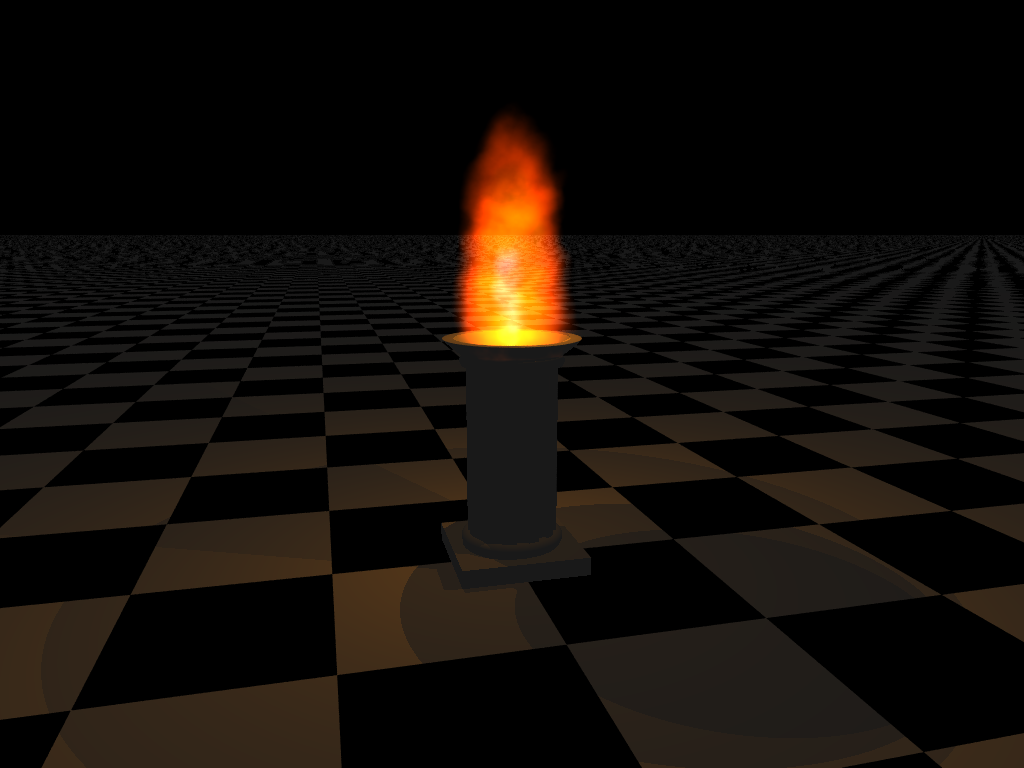
Here's a reminder of the original version from TR3: 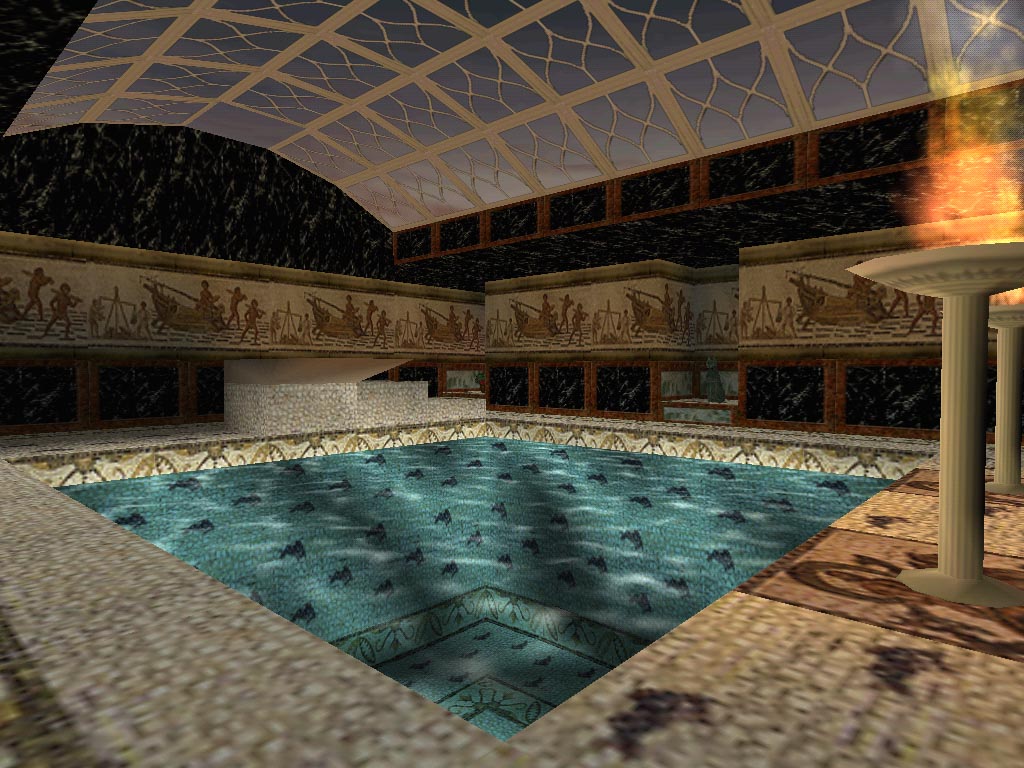
There's a lot of important stuff at the bottom of the page, like the FAQs and acknowledgements, which you should also read.
* in 2008
Final Renders
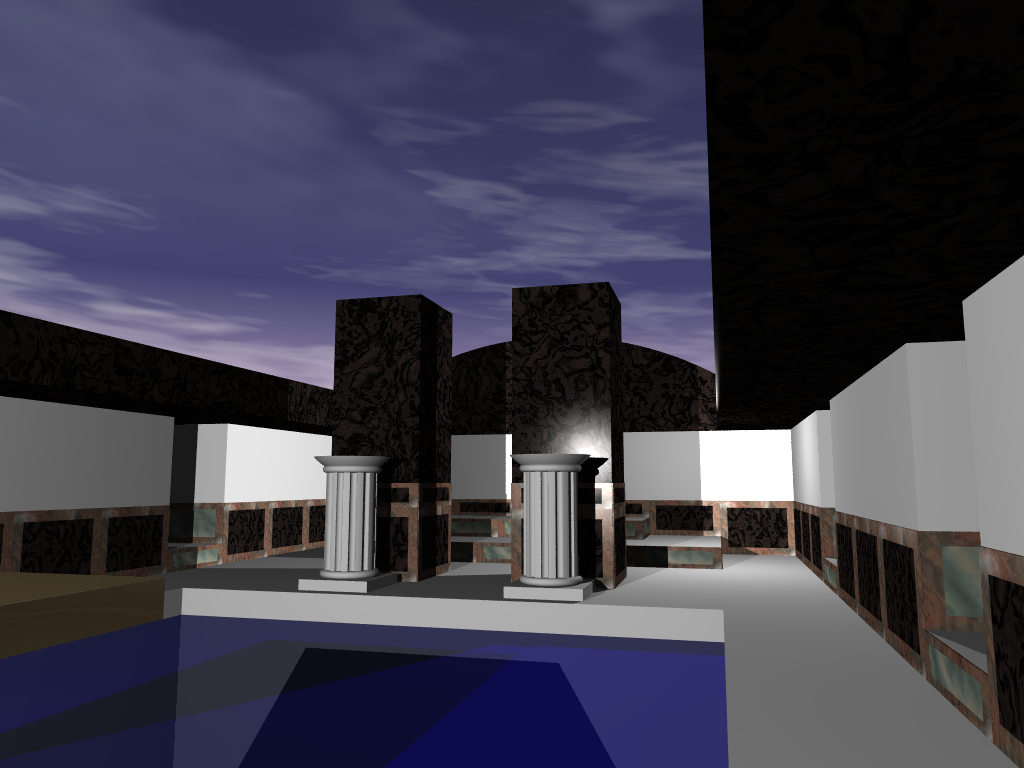
So, this is what you really came to see. Each thumbnail links to a full size version at 1280x1024 - use your browser's back button to come back here after viewing them. Where I give compass directions: when you walk in the door to the swimming pool room, you're facing north.
|
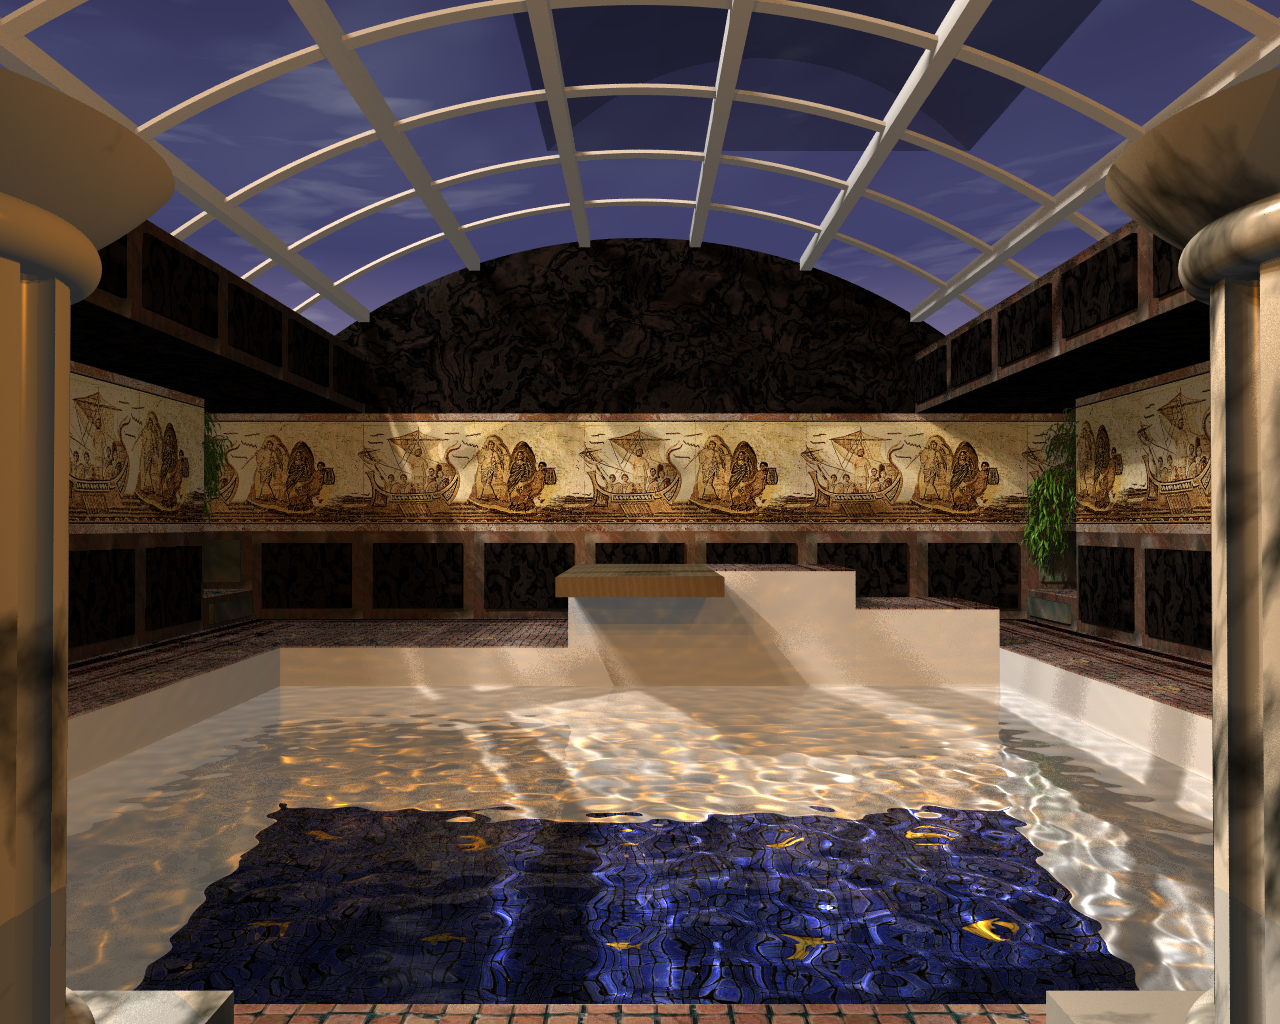
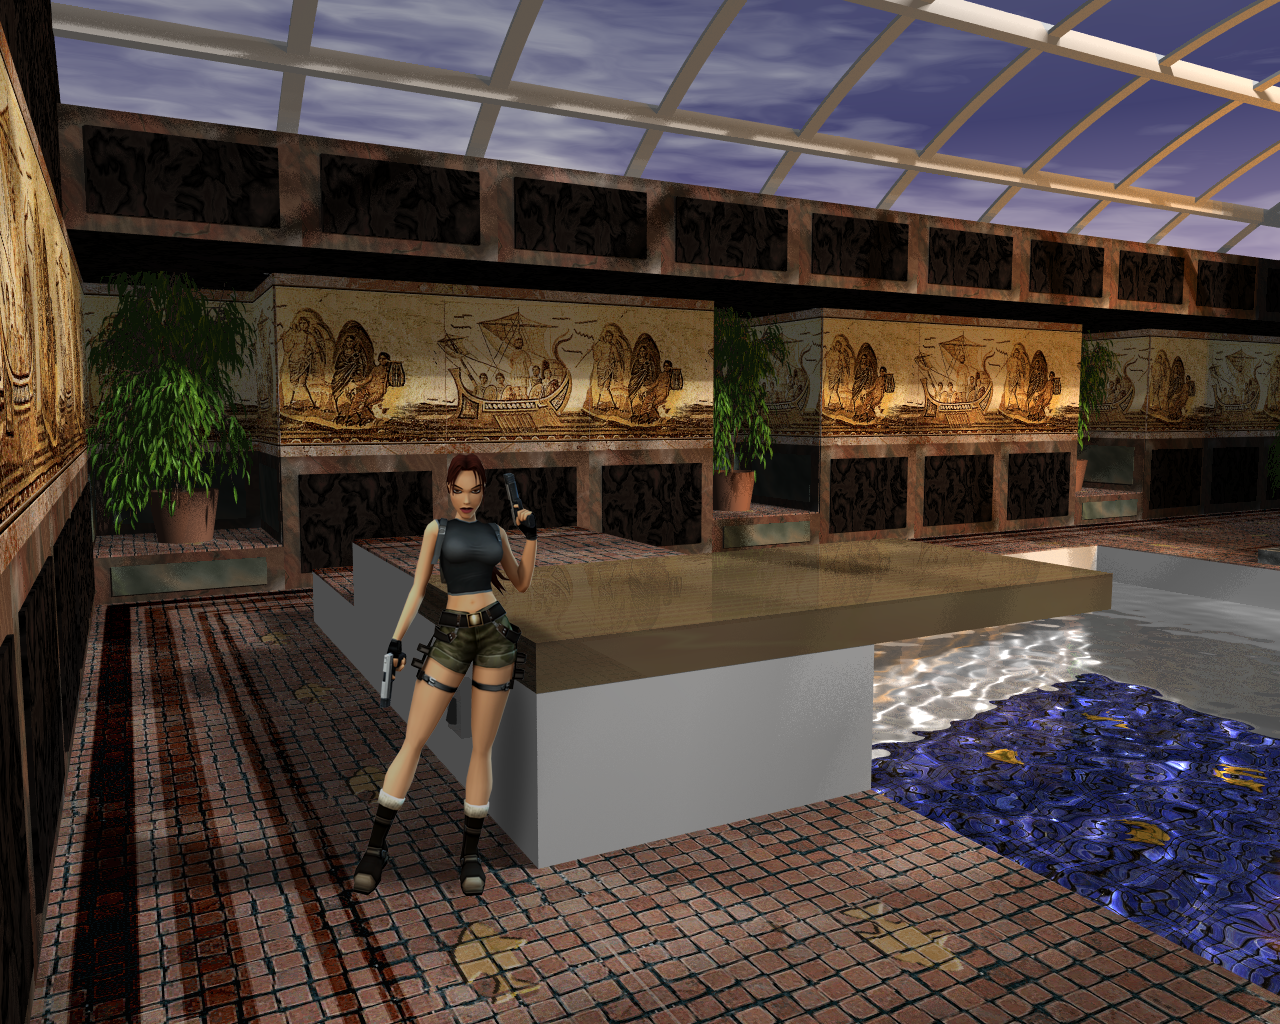
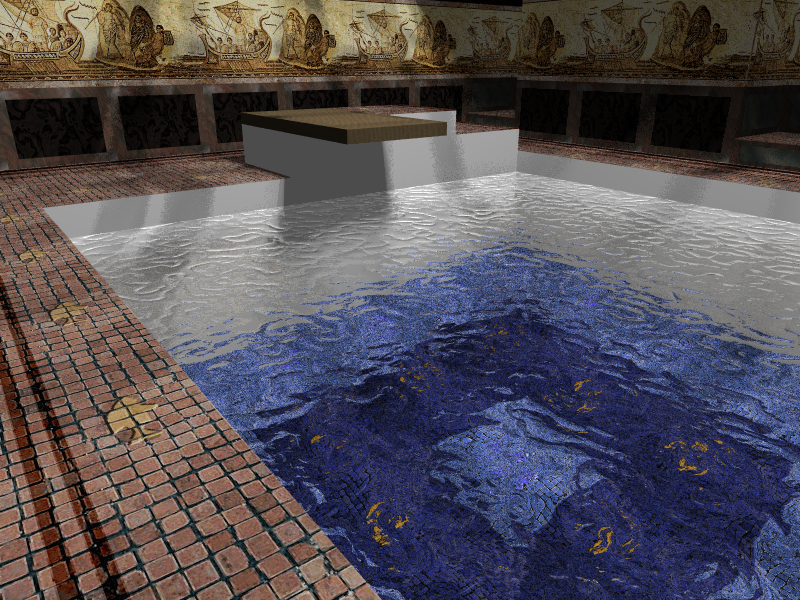
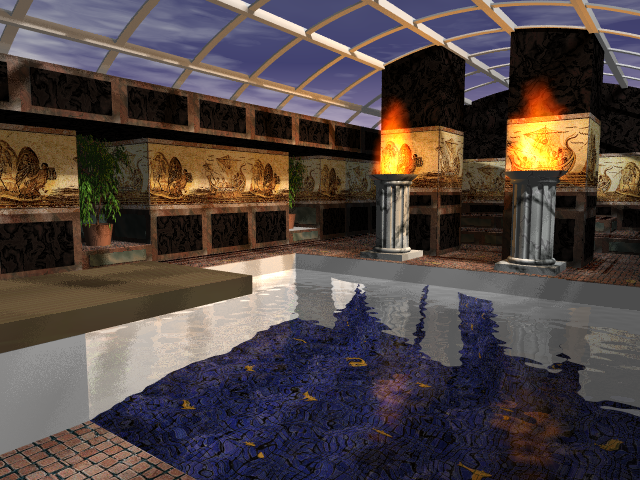
Looking northeast across the pool - this is the same view as the original screenshot above. |
|
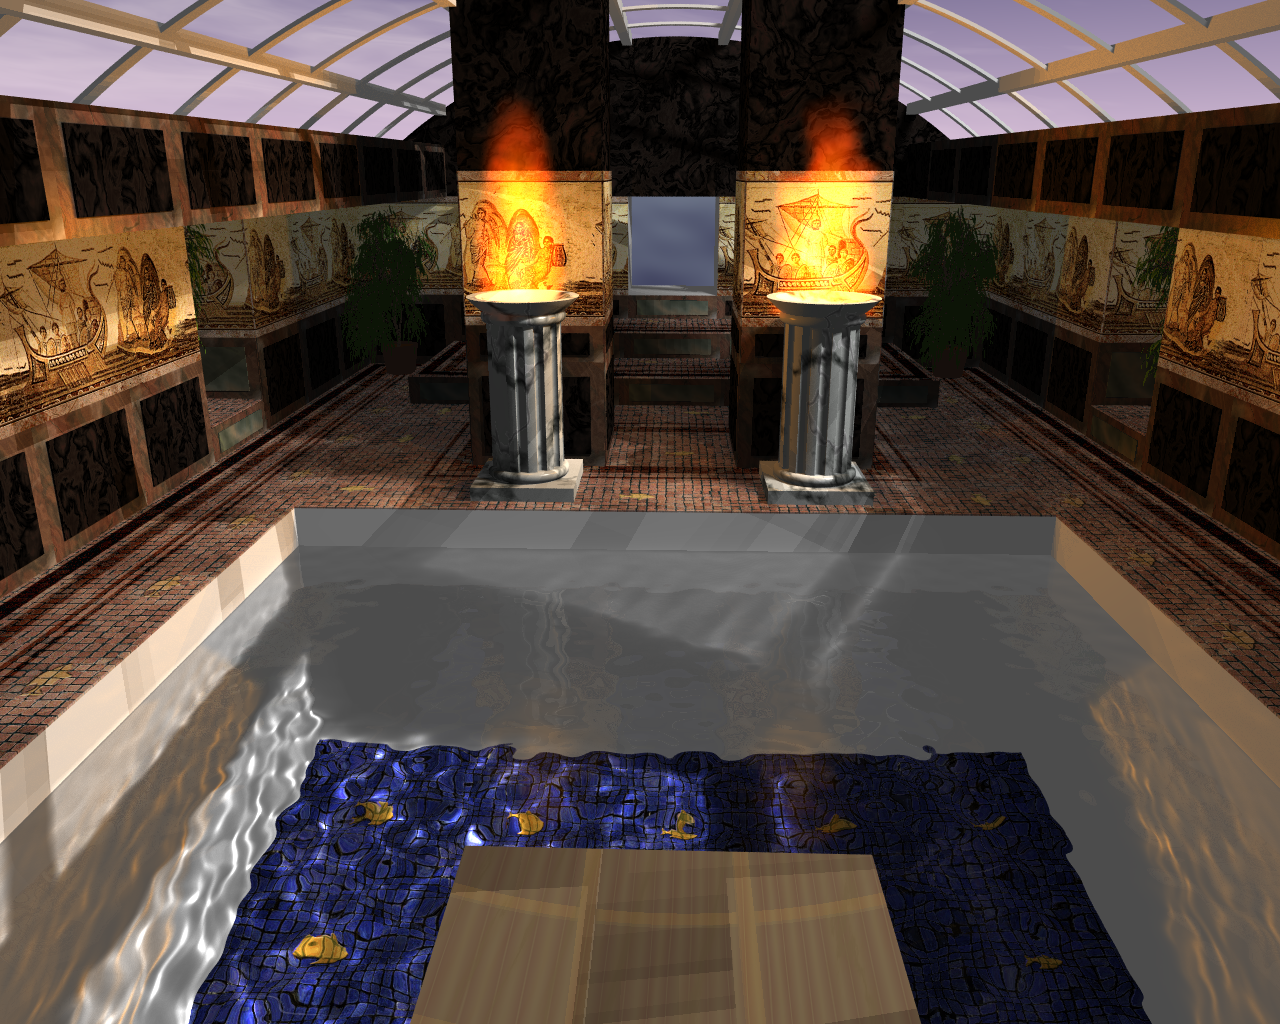
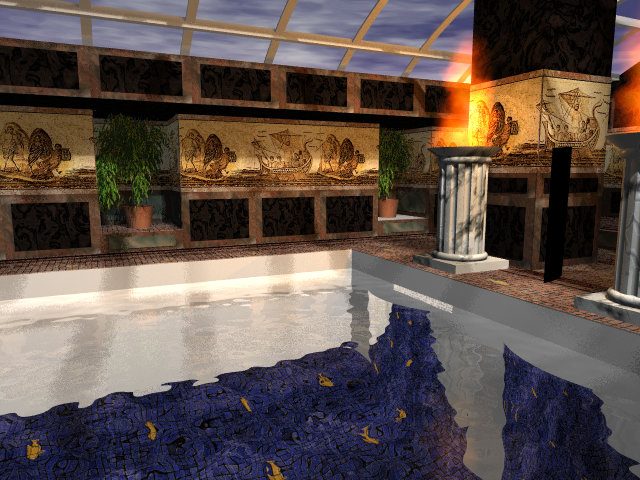
Looking south-east across the pool. |
|
Looking south-west across the pool. |
|
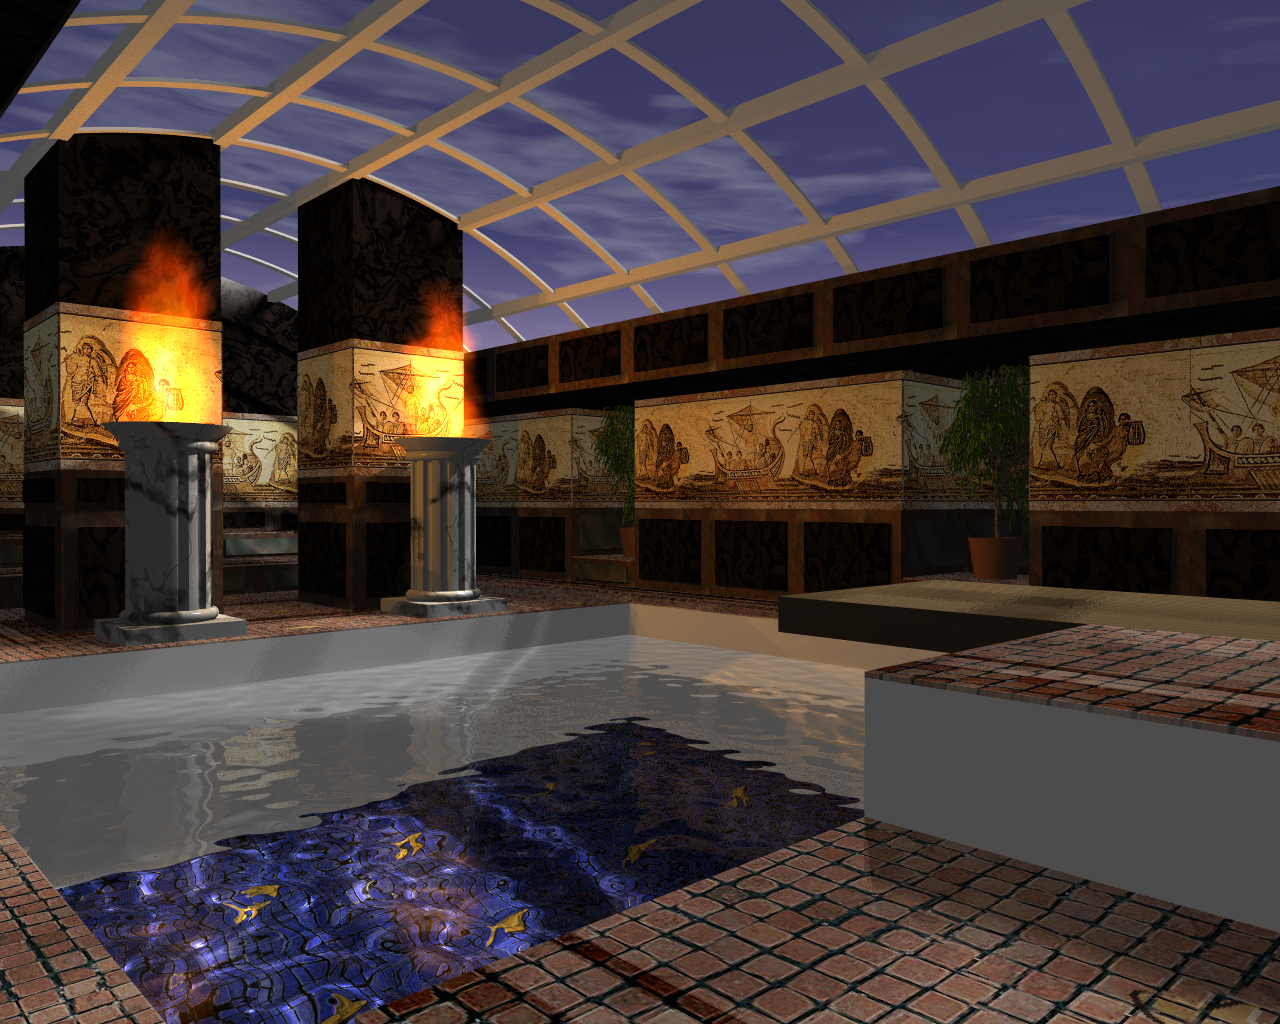
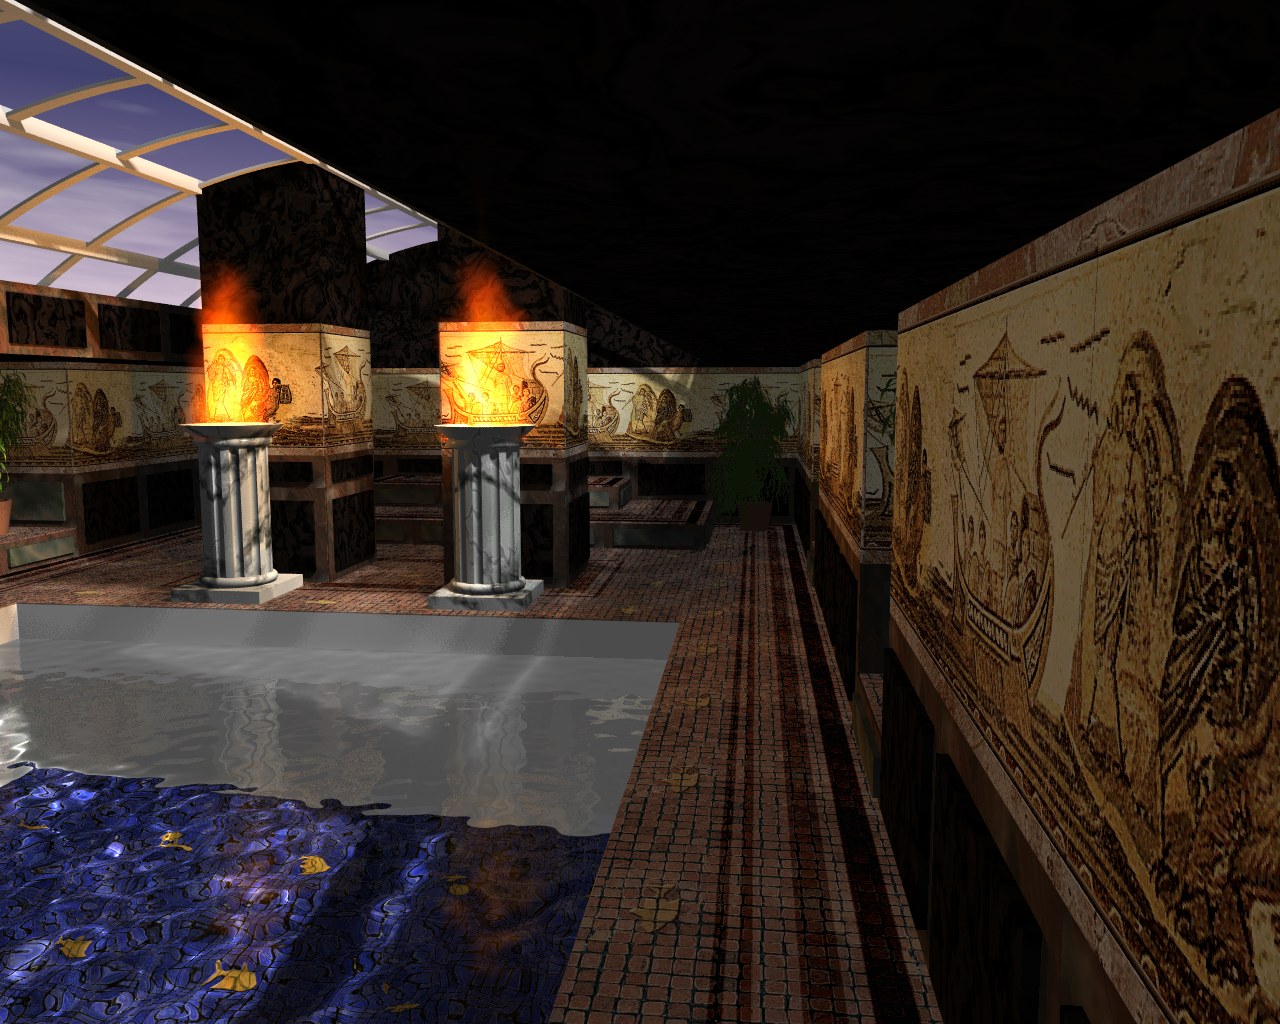
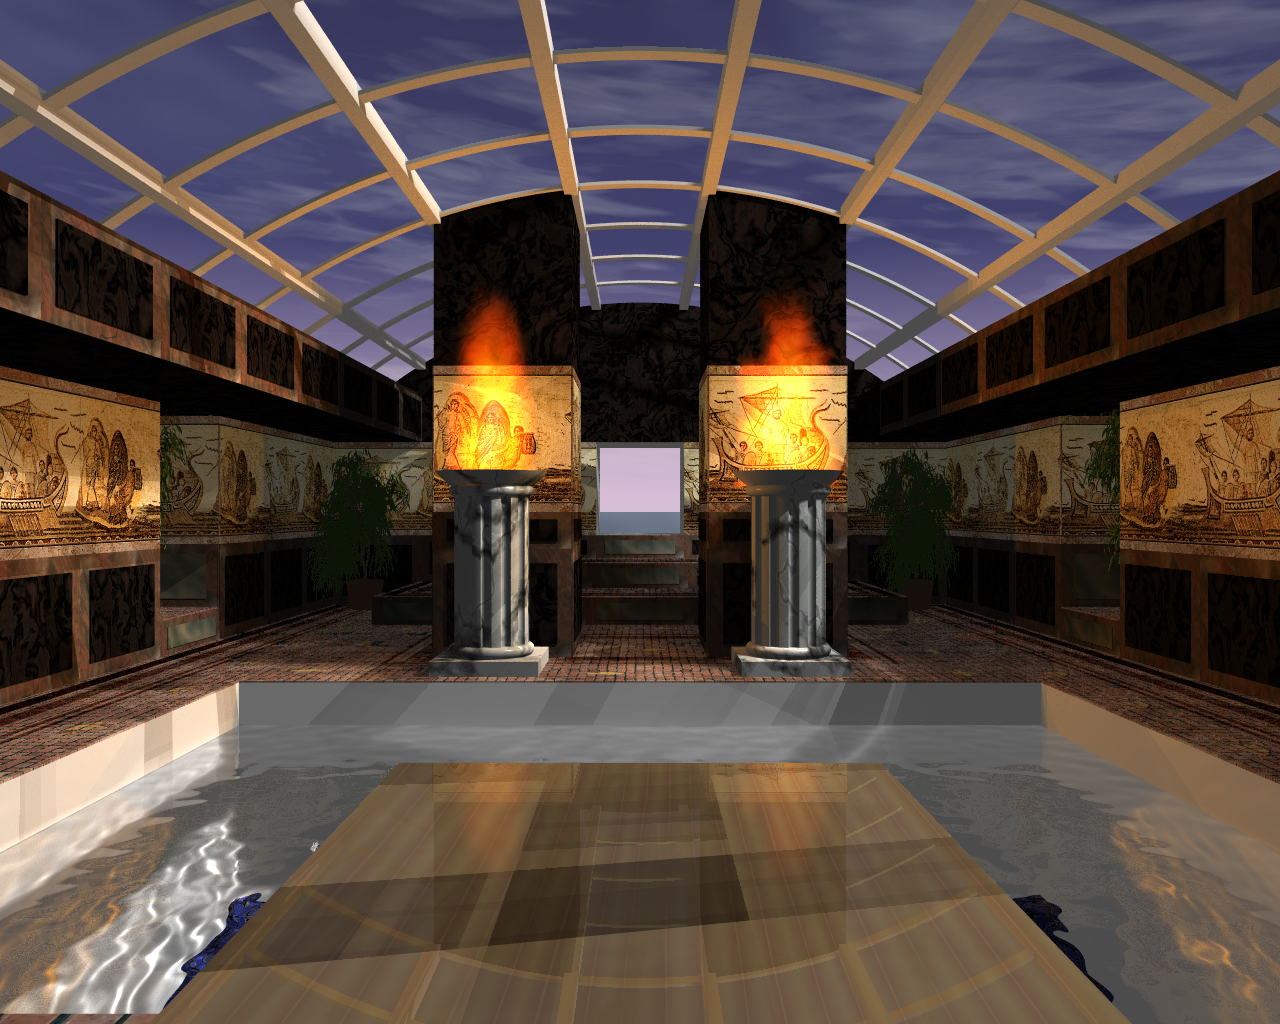
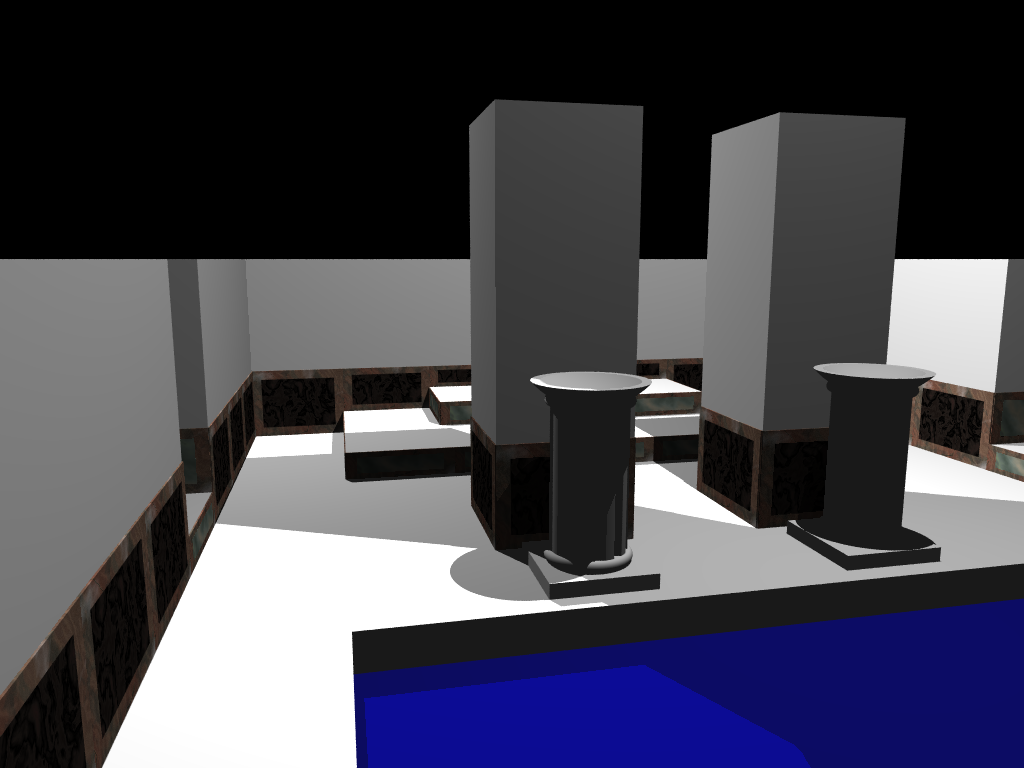
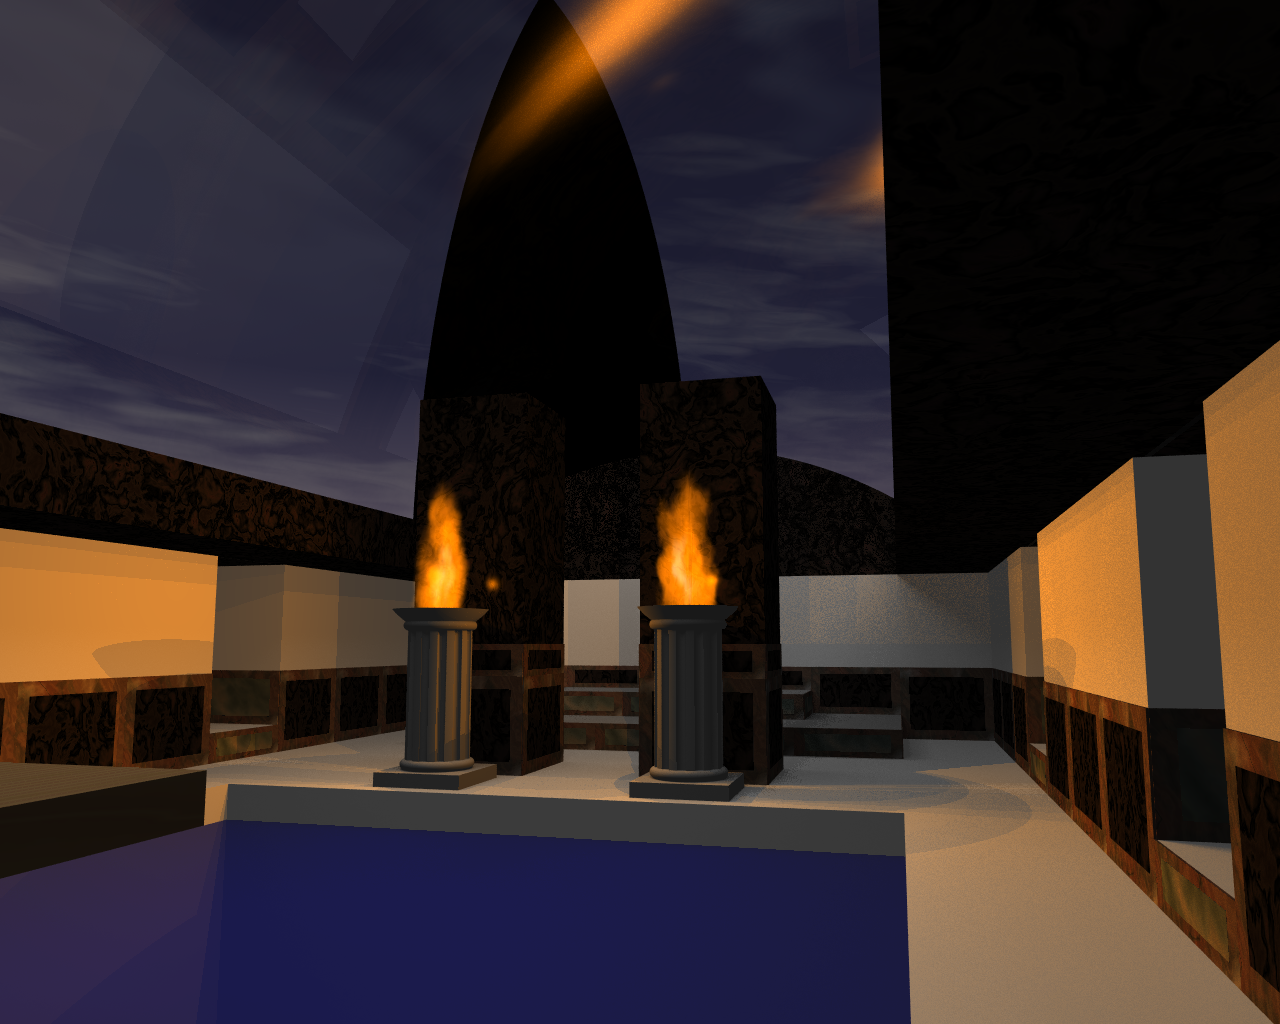
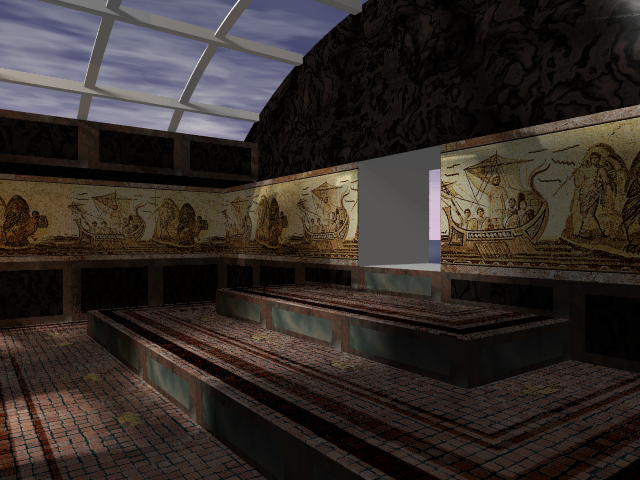
Looking north from between the fire pillars. |
|
Security camera view to the south. |

|
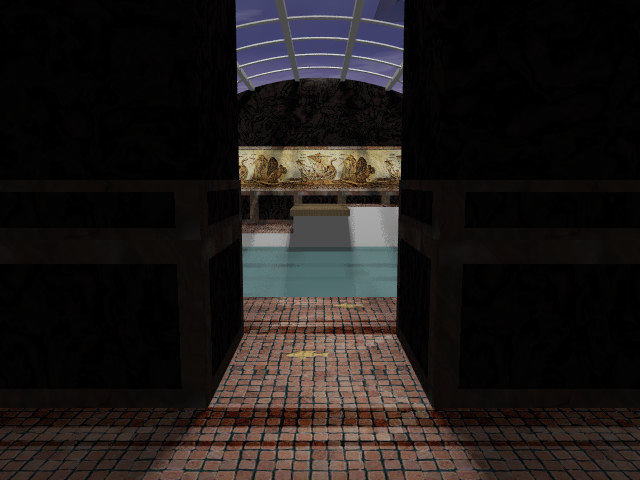
Looking north from the doorway. |
|
Looking northeast from the south-west corner. |
|
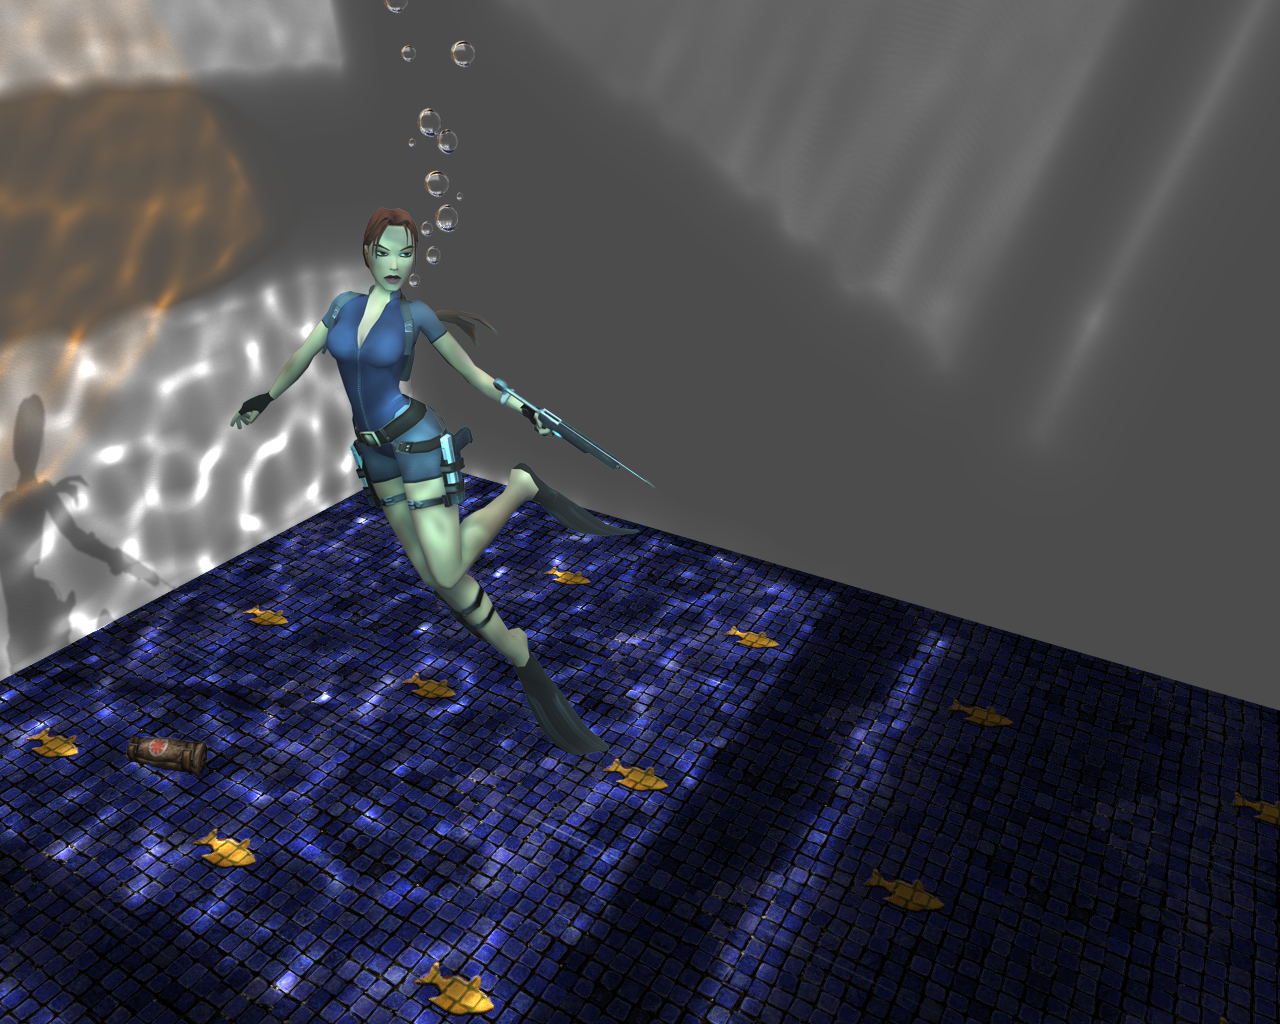
Underwater, with Lara. Yep, she's been edited in - my 3D modelling skills don't go that far. You can use your imagination as to why she has the harpoon :) |

|
Looking up and to the south from under the water in the pool. |
|
North end of the room by the diving board, with Lara. This is one of my favourites. |

|
Outside, looking in. Couple of rough edges - I didn't pay much attention to the detail here. |
|
Looking south across the diving board, which has some nice reflections. You can see out through the door into the conveniently nonexistent gym room :) |

|
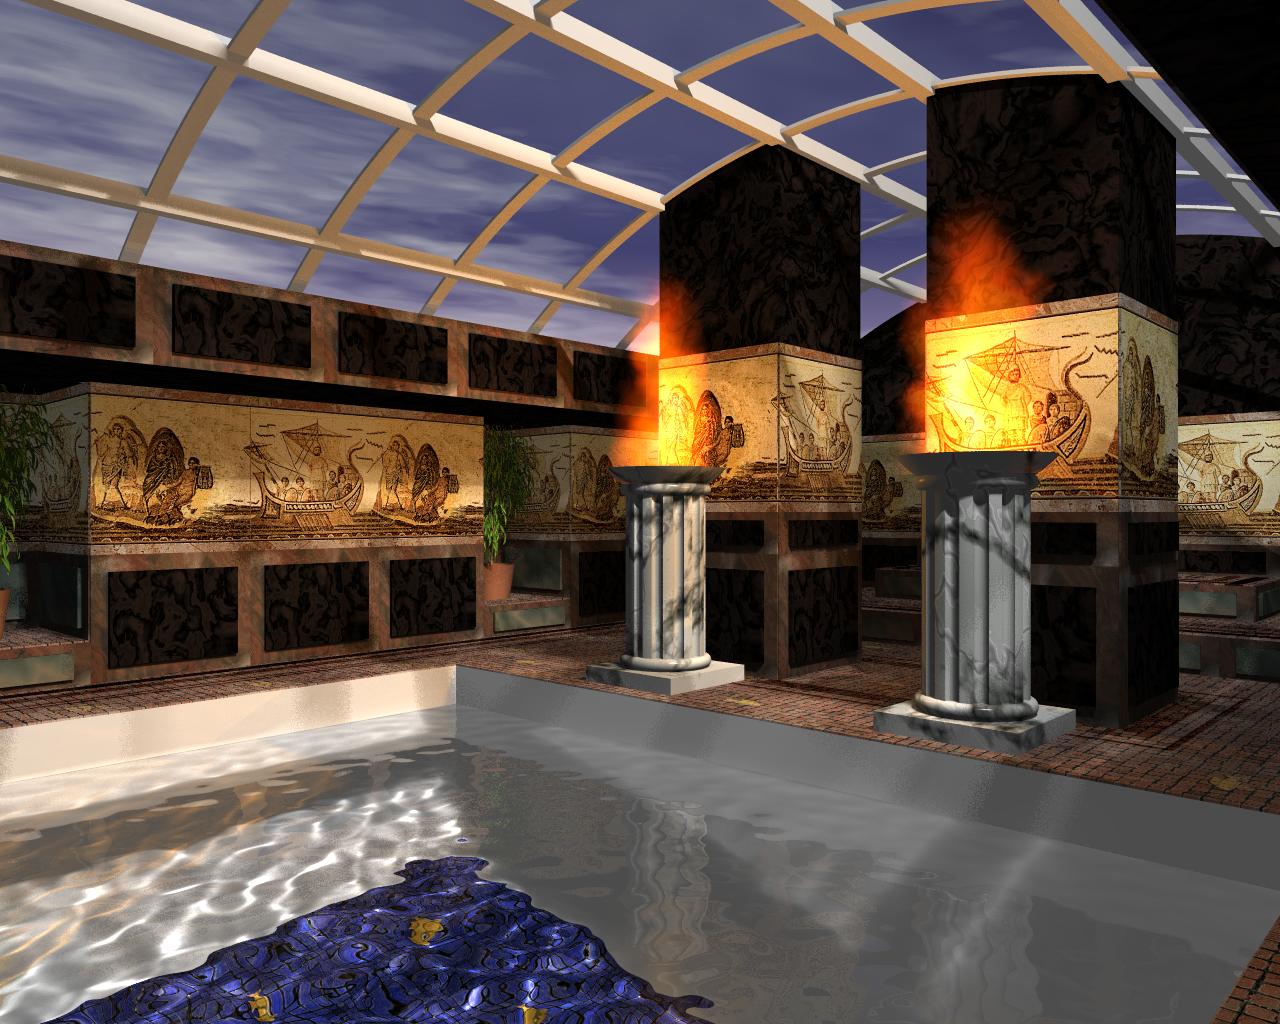
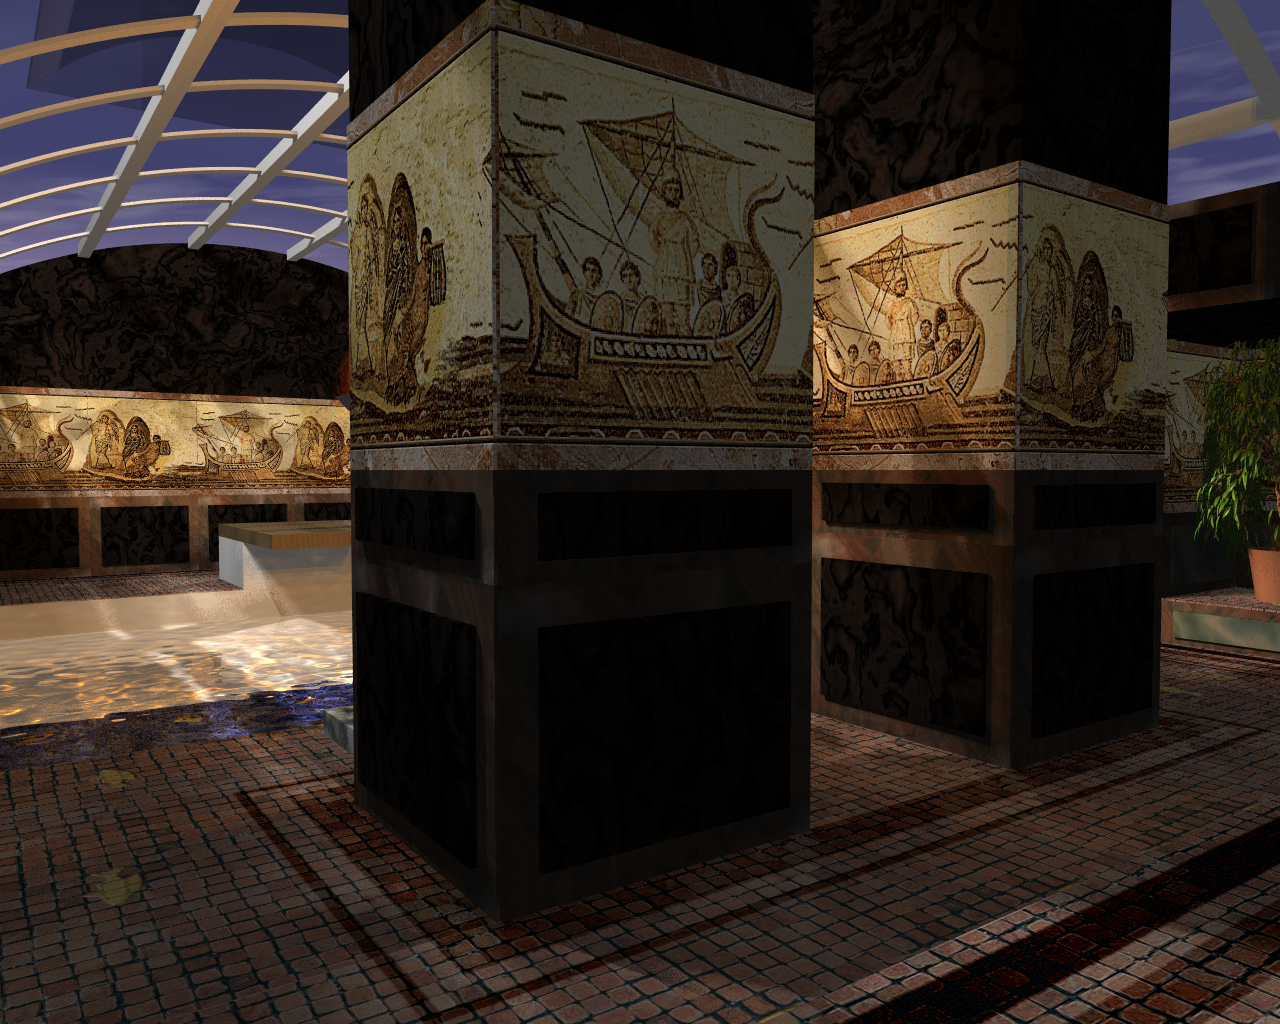
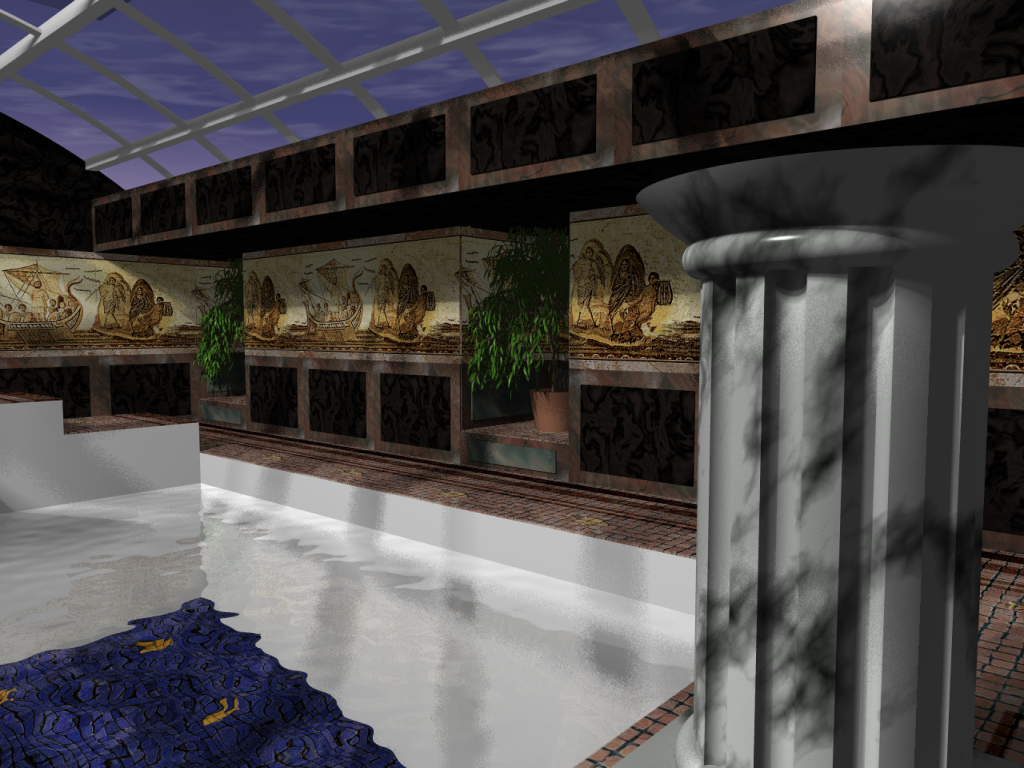
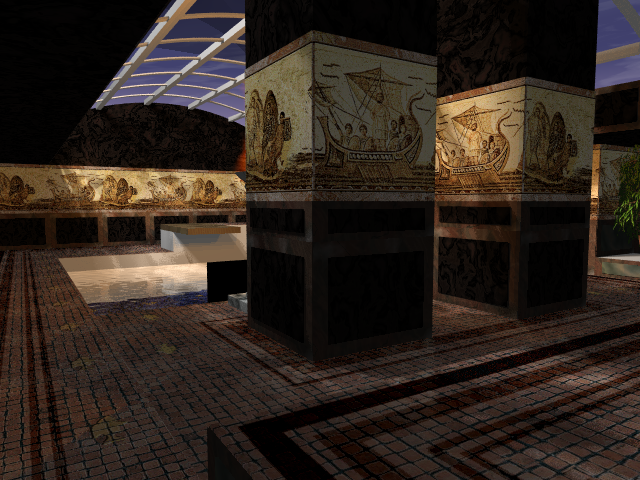
Another through-the-pillars shot, a bit closer this time. |
|
Stepping up to the diving board... |
|
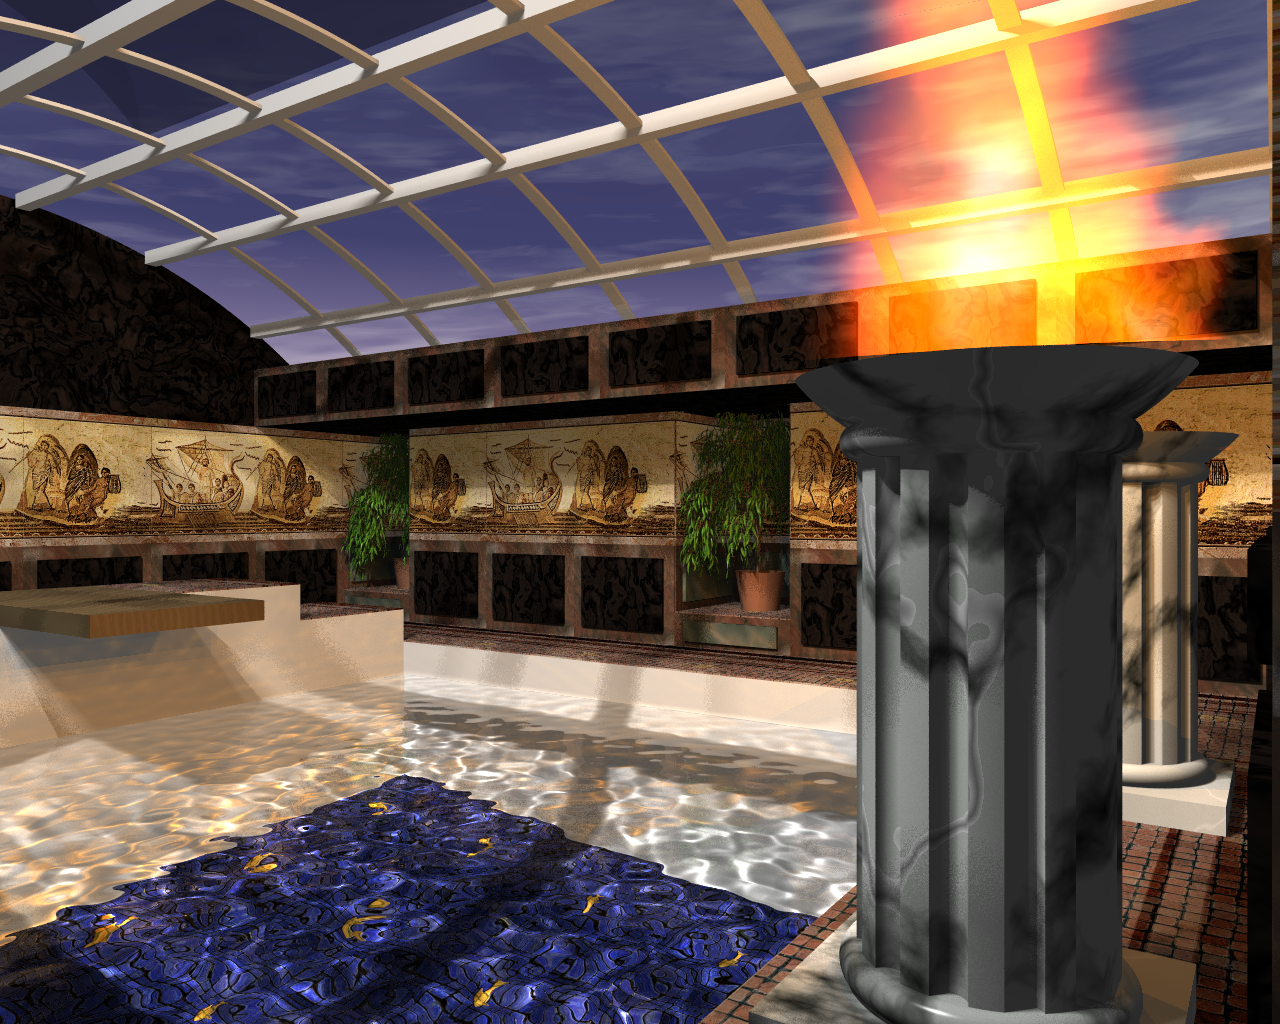
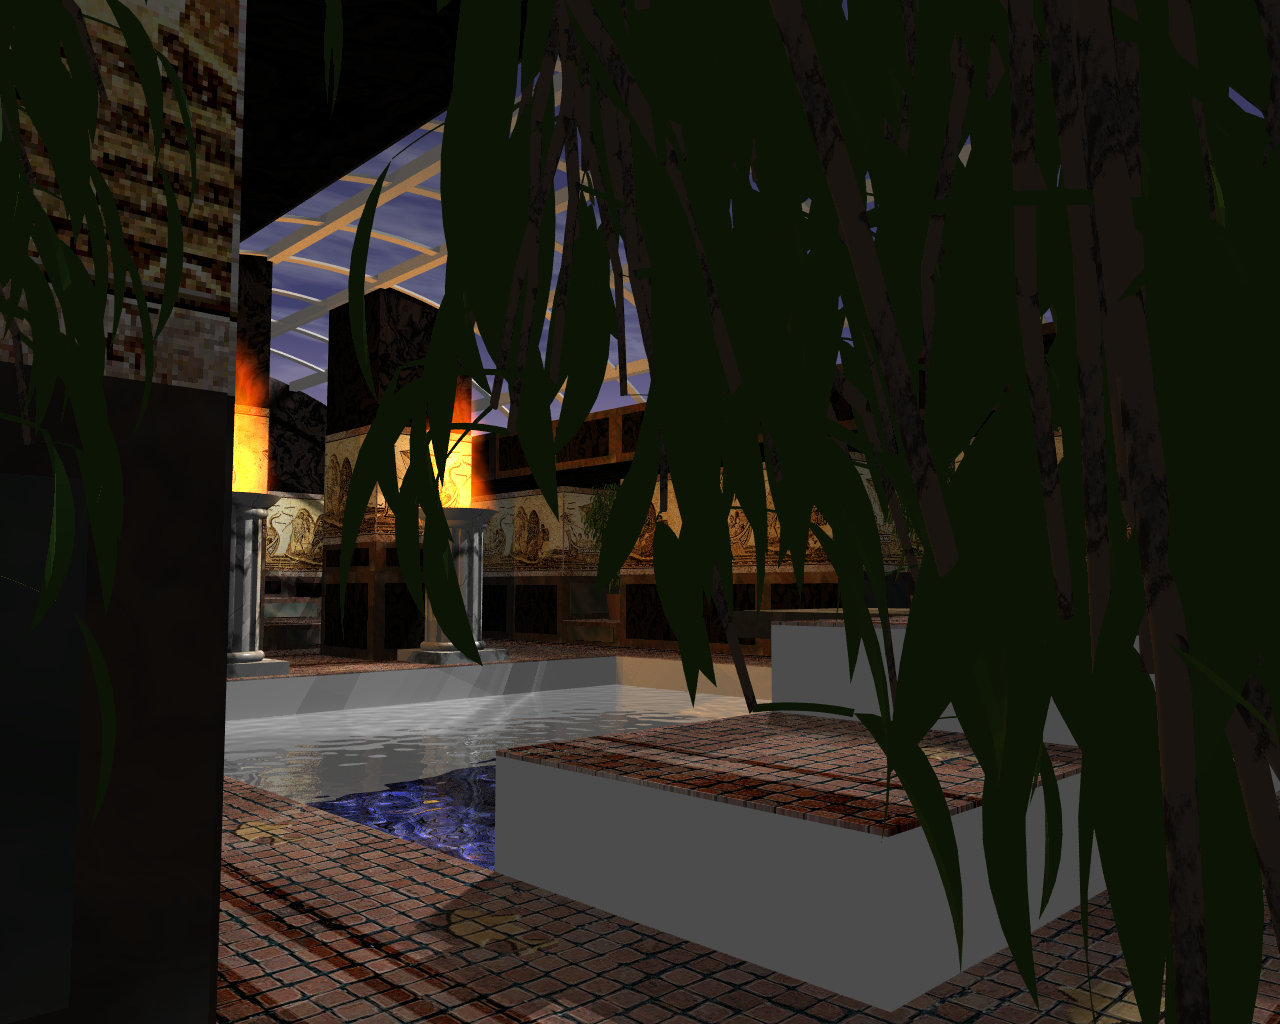
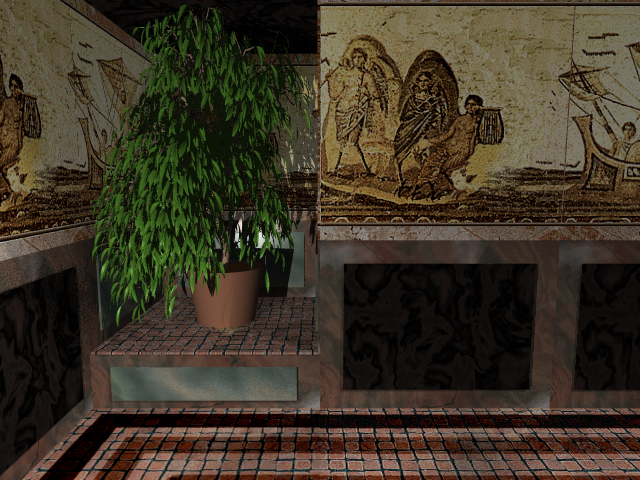
Looking out from behind the plant in the NE corner |
Video/360° View
In addition to the still images, I've now also put together a 360° view video that should give a better idea of how the scene is laid out. It's quite small because I didn't have all year to wait while it rendered, and is in WMV format.
Development Pics
The scene as you see it above took about a month and a half to build. During that time a lot of development work went on which generated a lot of renders. I've included those here for your entertainment.
They're in vague chronological order but there are a couple of places where development backtracks a bit. For example I started out using a GUI to build this, but outgrew it and went back to editing the raw text "Scene Description Language" text files. This meant I had to throw away my work with the GUI and start again (which happened between the third and fourth pics - that's why the floor pattern disappears and the columns for the fire change slightly).
|
First mock-up of the room layout. |

|
Added the front wall and steps, and a couple of roman column type things for the fire. |

|
An attempt at doing the fire for the columns goes horribly wrong... |
|
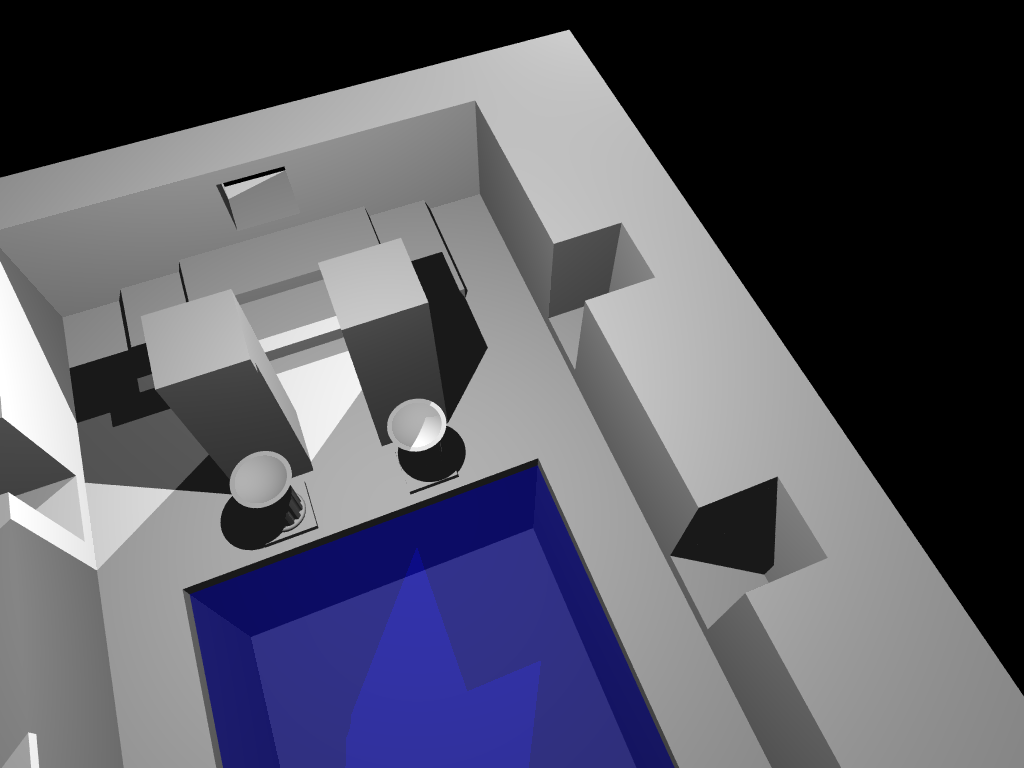
Overhead view with the alcoves cut out. |
|
Started doing some of the stone panelling - each panel had to be individually positioned. |
|
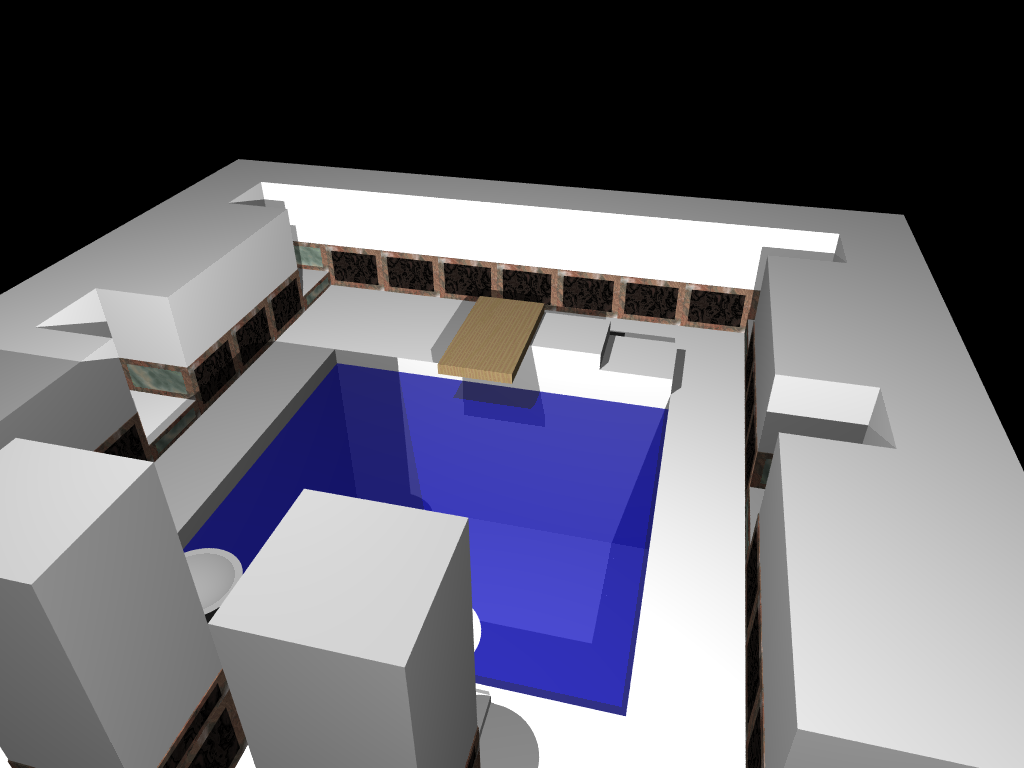
Put a nice wooden diving board in and done some of the panelling inside the alcoves. |
|
Here's a nicer view of the columns, also some of the roof has been put on. Note the dodgy lighting - this was quicker to render than proper "sunlight" while the scene was still being built. |
|
A halfhearted attempt at some fire. Notice it doesn't even light anything up orange! |
|
This is a bit better but the lighting's still bad overall. |
|
There's the glass roof. No idea what the massive black reflection is from - but that's what you get for cheating and not doing all the panes individually. |
|
Added some frames for the roof windows. Also some slightly better lighting overall - looks more like daytime now. |

|
Added texture panels! I stole most of the textures so see the acknowledgements for the real genius. Also changed the water colour a bit but that's kind of irrelevant since the water gets totally redone later. |
|
The steps up to the (slightly unfinished) doorway, all nicely textured. The lighting's quite nice there. |
|
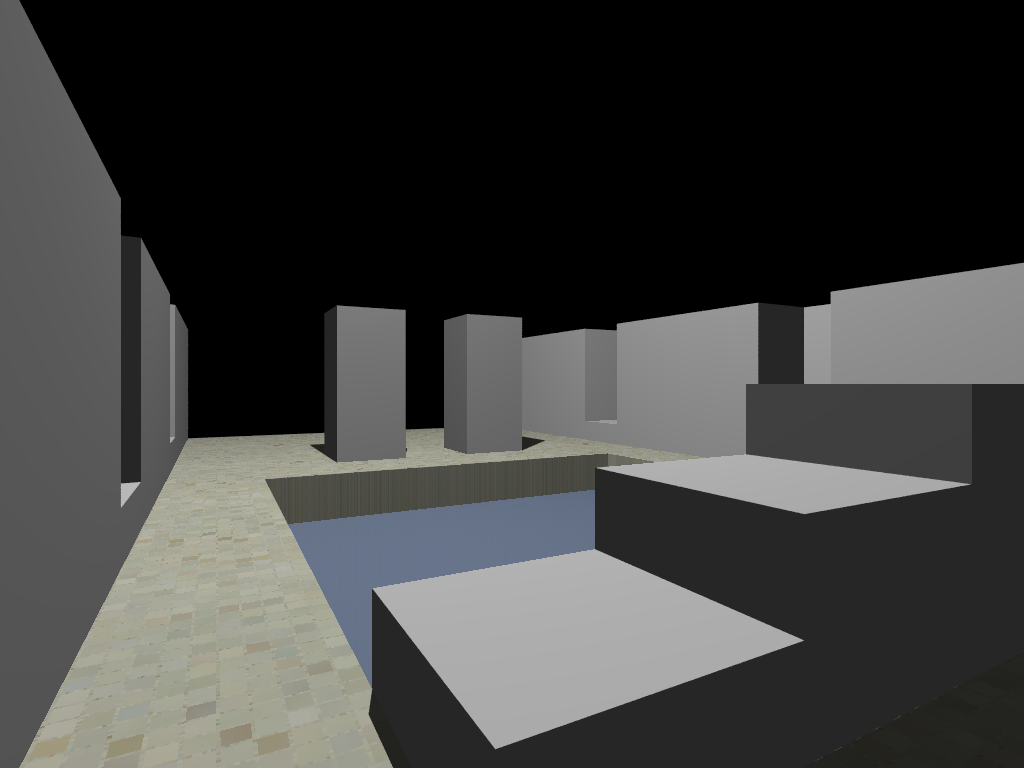
Looking north through the pillars - also nice but a bit dark. |
|
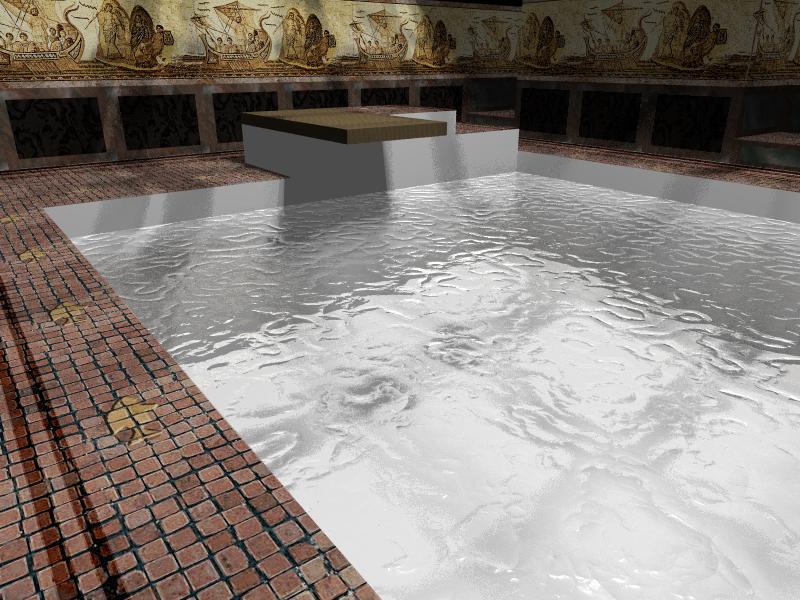
A first attempt at realistic water. The patterns a bit rubbish but at least it's not flat any more. |

|
Tiled the bottom of the pool with a blue version of the mosaic floor tiles - not a bad effect actually... |
|
Tried a pattern for the pool floor, but its probably better plain. |
|
Added a pretty convincing plant to each alcove (since I'm useless at modelling cat statues like the game actually has). Once again you should see the acknowledgements because the plant generation code isn't mine (the pot is though). |
|
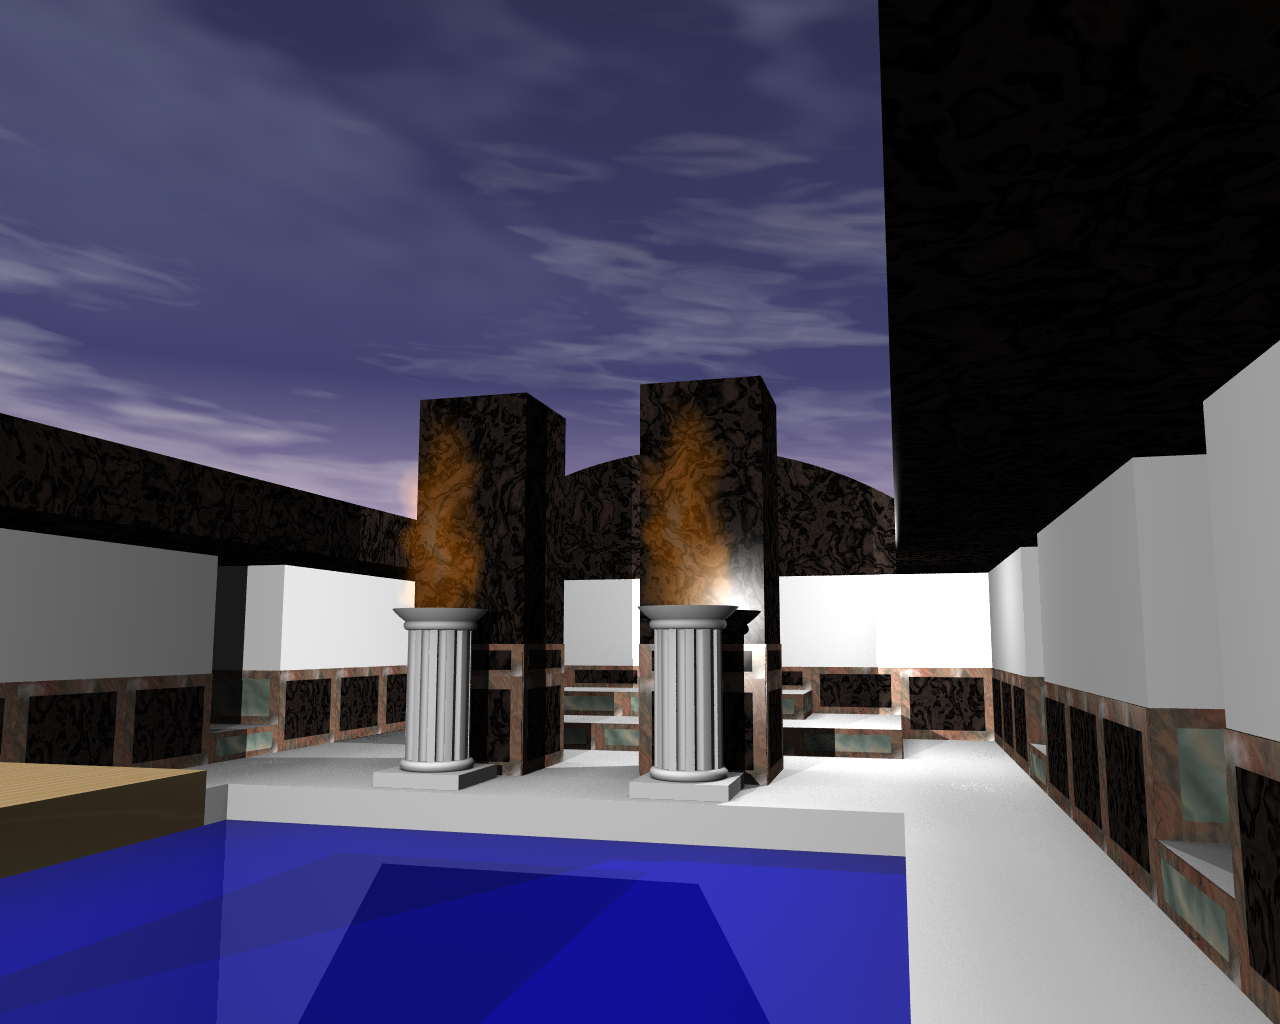
So here's some water that finally looks realistic - although the reflections and refractions aren't quite right yet. This is with fire turned off, by the way, which is why there's no orange tint to everything. I also moved the sun to give light the plants on that side a bit better. |
|
Same again, with fire turned on. Pity it doesn't actually show up on the pillar in view, but you can see its effects. |

|
So I accidentally deleted the fire and had to redo it. Back to the failed attempts that look like someone was over-generous with the fuel... |
|
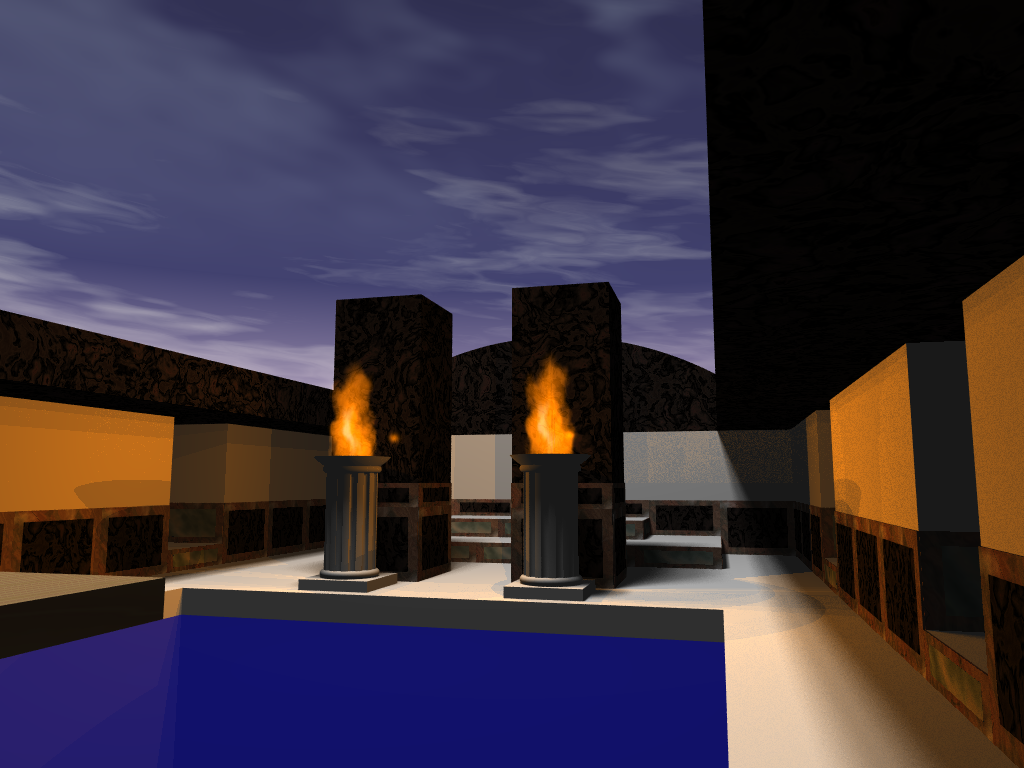
Finally some decent fire - made the short detour into debug mode (with the ubiquitous checkerboard) worth it. |
|
...and with the fire in place. Starting to look alright at this point - apart from the dodgy refraction in the water just under the pillars. |
|
Different angle. |
|
An annoying black rectangle made an appearance. Probably the fire pillars interfering with each other. |

|
Finally, I accidentally import the checkerboard plane used for debugging into the scene. Although it doesn't actually look bad, the lady of the house isn't happy (and through her appearance we see how the whole thing works scale-wise)... |
Source Code
Released April 2013
Originally when I built this webpage I chose not to make the model's POV-Ray source code available. However I recently remembered this project (some 4½ years later), and changed my mind. For those wanting to render their own views and adaptations of my scene, or needing some example code to help them learn POV-Ray, or whatever reason really - help yourself to the source code zip file below.
Once you have downloaded it and extracted the files, just open up swimmingpool.pov in POV-Ray (which you'll need to get and install if you don't have), and you're ready to go. Be warned: as with any programming language there is a learning curve to POV-Ray if you've never used it before - it's unlikely you'll be able to produce the renders you want unless you take the time to learn some basics.
FAQ
(New!) It's 2018 and I'm not impressed; in-game graphics are way better than this now so why did you bother?
Yep, this project is 10 years old now and hasn't been updated which is why it's looking dated. But it was fun to do and POV-Ray as a tool is still alive and well today so go check it out.
Why aren't there more renders and videos, or some playable demos?
Although the raytracing technique gives you very nice realistic-looking images, it also takes ages to render (we're talking a couple of hours for one frame here). Given that video and games need about 20 FPS to look vaguely good, rendering all those frames is just out of the question. Having said that, people do make videos with raytracing - it just needs a lot of computing power.
Just to make these some of these stills I distributed the job to four PCs to try and cut the render time - this was my setup:
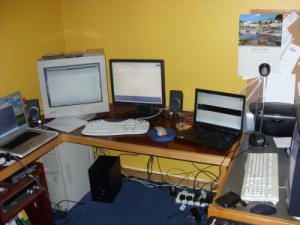
(Wow, that's looking old now - CRTs and beige!) The professionals have much bigger clusters to build things like movie CGI.
I have made a small (320x240) video which is a 360° camera rotation view. This took about 24hrs to render all 400 frames.
What exactly is ray tracing and how's it different to the 3D you see in games?
I could explain, but my explanation would be rubbish. Your best bet is to read Wikipedia for a general overview.
What tool(s) did you use to make this?
I started off with Moray which is a graphical modeller for POV-Ray (the Persistence of Vision Raytracer). It had a couple of flaws I didn't like though so I resorted to coding POV by hand.
For example, you'd specify a cube by putting box { <0,0,0>, <1,3,4> } where the numbers are the 3D coordinates of opposite corners, then you can add other things like texture and lighting.
As you can imagine the above scene is a lot of code.
Can I have the POV source files?
No. Yes, actually - see the Source Code section above.
Will you ever do any more of the rooms?
Probably not. It takes a long time and I no longer have unlimited leisure time!
Reuse and Distrubution
I personally don't mind if you reuse, distribute or do whatever with these renders (as long as you don't try to take any credit for my work on them - even implicitly). You should remember though that most of the textures and of course the pictures of Lara herself aren't mine to give away with no-strings-attached. See the acknowledgements.
The same goes for the source code, which I have now published above for download. You may incorporate any parts of the code that I wrote into your own projects - acknowledgement is nice but not essential. Watch out for the textures and Tree Macro though; those are not my work and their original licenses should be honoured.
Banner
If you want to link to this page and don't like text links, you can use this:

Acknowledgements
As hinted several times above, I can't in all honesty claim everything here as my own work. Specifically:
- The textures belong to Antonijadis at Tomb Raider Xtra. Unfortunately he's not actually on the list of artists who allow reuse but I've followed their rules so hopefully no-one will get too upset.
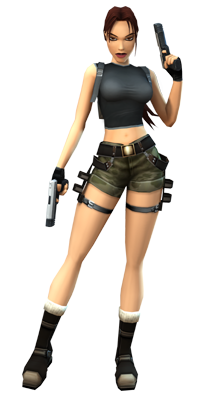
- Lara Croft and the images of her obviously belong to Eidos Interactive, but they get so much use on other fan sites I'm hoping Eidos won't mind me adding a couple here.
- The room layout of course isn't mine, it was designed by Core Design.
- Many thanks to the lovely Katie Fleming for having the patience to look at the endless test renders, and helping out with promotion. Also, being lazy, I copied the screenshot of the real swimming pool (above) from her site instead of taking my own.
- The trees come from the MakeTree 1.0c macro by Gilles Tran.